Thursday, December 13, 2012

Reindeer sandwich


My kids loved this lunch! Leave it to Martha to think that you could turn a gingerbread man cookie cutter upside down and make it look like a reindeer. Take a few extra minutes to make this lunch, and really get your kids excited for Christmas.

To make:

Melt a few tablespoons of chocolate chips in the microwave, on 20 second intervals, until the whole dish of chocolate is melted. Pour the chocolate into a small plastic bag, and cut the corner of the bag. On a piece of wax paper, pipe some small antlers. Place the wax paper in the freezer while you make the rest of the sandwich.

I made a ham sandwich for Claire. To make the eyes, I cut a mini marshmallow in half, and stuck a mini chocolate chip on each marshmallow. I placed a red smartie on the tip of the sandwich for the nose. Take the wax paper out of the freezer, and carefully peel off the antlers, and place on the sandwich.

That's it! I hope that your kids enjoy it as much as mine did.

Wednesday, December 5, 2012

cork stamped ornaments


I love these cork print ornaments that Claire and I made. They are not made using traditional Christmas colours, but obviously you could make these with whatever colours you prefer. They require a little planning, but don't take very much time to make.

Required supplies:
cardstock (I used 4x4 paper)
paint (various shades)
paper scraps for flag/pennant thing
sewing machine (OR staple a length of bakers twine or ribbon to the ornament)
scissors
black pen/marker
wine cork

To start, I cut my cardstock into 4x4 squares. Rather than let Claire go all willy nilly stamping the cork all over the page, I made a few very tiny, very light dots with a pencil where I wanted her to stamp the ornaments. She had fun choosing what colours went where.

When the paint was dry, I sewed a line from the top of the ornament to the top of the page. You could just cut a piece of twine or ribbon and staple it on the page. Draw little hooks on the top of the ornaments.

Use two paper scraps to create the flag/pennant at the top of the page. I used a couple of Christmas rub ons that I had. You could just write Christmas words, but I don't always love my handwriting.

I chose just to make these as decorations, but you could use a larger piece of paper, and make it into a card, or conversely, using a smaller bit of paper and make gift tags.


Linking up with: Six Sister's Stuff &  Skip to my Lou & Tip Junkie & Weekly Kids Co-op & Tatertots and Jello

Monday, December 3, 2012

sprinkle pudding cups

 I love this idea of lining a milk cup with sprinkles. It has been beautifully photographed here. As one of the kids Advent activities, we had a little Christmas tea party yesterday. I had a lot of Christmas sprinkles kicking around, and these cups only took a few extra minutes to make. They were definitely worth making, the kids LOVED them.

To make the glasses, grab whatever chocolate you've on hand. I used chocolate chips the first time I made them, and bittersweet chocolate the second time. Melt it in a double boiler, or in the microwave on intervals. Dip the glass in the chocolate, and then in a bowl of sprinkles. They will set quickly.


My sister (is law) brought over some of the whipped shortbreads that we love so much here. I made Christmas Rice Krispie squares, and homemade chocolate pudding. I used this recipe, but I found it a bit too chocolatey. Never thought that I'd say that! It would be just as nice with
whatever store bought pudding you like. Whenever we have tea parties here, I fill the tea pot with chocolate milk, and the creamer with milk. The kids love stirring the two together.

For our advent activity today, we're going to write and post our letters to Santa. The anticipation is starting to build...


Thursday, November 29, 2012

cute penguin craft


What a cute penguin craft to brighten up these dark winter days! I am so proud of Claire, because she cut all of the penguin pieces all by herself. This was just the second time that I traced shapes on paper and asked her to cut them out.

What you need:
black paper
white paper
orange paper (scrap)
patterned paper (with a small pattern)
12x12 background piece of paper (your colour choice)
decorative ribbon
black marker
scissors
glue
template

Start by printing off the template. Cut the pieces out of the template and trace them on the paper. The main body and wings need to be traced on black paper (I used a white colouring pencil which worked well.) Then penguin tummy and eyes need to be traced on white paper. I used an embossed piece of white paper for the tummy. I like the extra piece of texture that it adds to the penguin. Trace the beak on orange paper. I forgot to include the template that we used for the earmuffs, so just make sure the circles that you use are bigger than the penguin's eyes.


Have your child cut out all of the shapes. Once cut, you can start to assemble your penguin on the paper. We started with the main body, followed by the penguin tummy, eyes, beak (fold in half) and earmuffs. I cut a scrap of ribbon for the long bit of the scarf, and then two small pieces for the tails of the scarf. Once Claire glued the scarf on the penguin, she glued the wings on, so that they covered up the cut edges of the ribbon. Lastly, she drew (traced) a line to connect the ear muffs, and dots for the eyes.

Click here for the link to the template.

Friday, November 23, 2012

handprint wreath

I still love doing handprint crafts, but now that Simon's 2 1/2, they're increasingly harder to do with him. He's a very independent two year old, who always knows just what to do, even without instruction. Read- he doesn't want any help. From anyone. Ever. I was so happy when he let me help him place his hand on the paper, not 1, not 2, but seven times! He did a great job using his thumb to make a few red berries the next day (once all the green paint was dry. I did not want to risk messing up all of those beautiful handprints.)

I knew that I wanted to add a bow to the wreath to finish it off. I tried drawing one myself, but that was a huge fail. I thought that a ribbon bow would look too small on such a large wreath (and I didn't want to buy ribbon just for this project.) Imagine my delight when I saw that Ellinee had pinned a link to their paper bows. I love the red chevron ones that they have posted, but my printer is running low on ink, so I printed the template and then cut out the bow using some patterned paper that I had on hand. The 3D bow was the perfect finishing touch for this handprint wreath.

Thursday, November 22, 2012

Christmas wreath craft


I think that this is my favorite Christmas craft yet. It was so simple to make too. My own Christmas cards that I'm making this weekend will be a spin off of this craft.

To start, I mixed a few different shades of paint together. I mixed green with white, green with yellow, and then just used plain green. Unfortunately, the contrast didn't show up as much as I'd hoped on the finished product. Claire stamped the rim of a small glass in the paint and then stamped it on the paper. Three times, once in each different shade of green. When the green paint was dry, Claire used a q-tip that she dipped in red paint to make the berries on the wreath. I tied a small bow with a bit of red ribbon that I found in my stash. To finish the card off, I used a stamp and gold ink pad to stamp the words love hope peace joy.

Are you making your own Christmas cards this year? I will have the kids make a few to send to their friends who don't live near us anymore.

Wednesday, November 21, 2012

Rudolph sandwich

I love making these cute lunches for my kids. They don't even think twice about eating them. They hardly take any extra time to make, this one took just over 5 minuets. That's it!


What you'll need:
bread (I used whole wheat and white bread)
1 mini marshmallow
2 mini chocolate chips
1 red smartie/m&m
heart cookie cutter (could use a large circle one)
small circle cookie cutter

We always have a million loaves of bread here, so I used a whole wheat bread for the big part of the sandwich, and white bread for the nose. Use what you have on hand. As you can see from the picture above, I used two slices of whole wheat bread and made a (peanut butter and jam) sandwich, and just one piece of bread folded over to make another peanut butter and jam sandwich.
Use the large heart cookie cutter to cut the large sandwich. Use the smaller circle cookie cutter to cut a circle from the small, folded over sandwich. Cut the marshmallow in half, and stick a mini chocolate chip on each sticky part of the marshmallow. Use the leftover crusts to form the antlers. Then it's time to put it all together. Place the heart on the plate, upside down. Add the antlers to the heart. Place the small circle on top of the heart sandwich to make the nose. Add the red smartie on top of the small circle sandwich. Add the eyes above the nose.That's it! It took me longer to write this blog post than to make this adorable lunch.


Tuesday, November 20, 2012

Christmas paper tree

 
This was one of the first Christmas crafts that we did this year. I originally saw a similar project done on Meg Duerksen's blog last year. Claire has a small attention span, so we made ours on a smaller scale. For our base, we used a white piece of 6x6 cardstock. I cut a bunch of green paper into strips for Claire. She put them in the order that she wanted to use them, and then, starting at the bottom, she cut each piece smaller than the last one. Then she glued them all onto the cardstock (using a glue stick.) When she was done, she drew a tree trunk on the tree and glued a star at the top. The first of many Christmas projects!

Monday, November 19, 2012

gingerbread waffles


It's starting to look a lot like Christmas here! The kids and I have been on a Christmas crafting storm around here lately. I have a week full of posts this week, and we're still going strong. 

I saw a recipe for these gingerbread waffles in a magazine for our local grocery store and knew right away that I wanted to make them for breakfast. The night before I was going to make them, I spent thirty minutes or so combing my Pinterest boards and browser history trying to find the recipe. That was before I remembered that I'd read it in a magazine, and not seen the recipe online. Not hard to tell that we're moving to a digital world!


These waffles will make your house smell so good all day long. Claire said the the batter smelled like donuts. How can you go wrong with that?

Gingerbread Waffles

2 1/4 cups all purpose flour
2 tbsp brown sugar
1 1/2 tsp baking powder
1 tsp baking soda
2 tsp cinnamon
2 tsp ground ginger
1/4 tsp nutmeg
1/4 tsp cloves
1 1/2 cups buttermilk
3 eggs
1/4 cup molasses
1/4 cup butter, melted

In a bowl, whisk together flour, brown sugar, baking powder, baking soda, cinnamon, ginger, nutmeg, and cloves. Add in buttermilk, eggs, molasses and butter. Stir everything together, until well combined.

Fill greased waffle iron with 1/2 of batter per waffle. Cook until golden brown. Serve right away with butter and maple syrup.

Note: Since I never actually have buttermilk on hand, I just add white vinegar to my milk and let it sit for 5 minutes before using it. For this recipe, add 1 1/2 tbsp vinegar to the 1 1/2 cups of milk.

I love waffles, but for some reason my kids prefer pancakes. I made pancakes for the kids using this recipe, and waffles for myself. If you're going to make these into pancakes, I would add another little splash of milk to make the batter a little runnier.

Recipe adapted from Sobeys' Inspired Magazine Holiday  2012

Enjoy!


Monday, October 29, 2012

Halloween party!


We hosted a little Halloween party here this afternoon. I planned almost everything from ideas that I had seen on Pinterest.

I made banana chocolate chip muffins and used these cupcakes toppers that I had picked up last year from Winners. (Made by Wilton) Want the recipe? I used my Best Banana Muffins Ever recipe found here.

I love these stickers that Claire and I stuck to the bottom of these Hershey's Kisses. Is anyone else excited that they changed the formula for the kisses? I think they are delicious now! I found the printable here.


I baked sugar cookies on popsicle sticks and decorated them to look (sort of like) mummies. These were a big hit with the kids, I mean come on, cookies on sticks?! That's where it's at.


I put a bit of floral foam in the bottom of these containers that I picked up at Dollarama to hold the cookies.


 Sticking with the mummy theme, I wrapped up a few juice packs using white electrical tape and googly eyes. I also decorated cookies that had been cut with a gingerbread cookie cutter to look like mummies. I used M&M's for the eyes.

 One of my favorite things that I made was this banner. I used my cricut to make it. I cut 5" circles out of black cardstock, and then cut all of the letters on white paper, using my Opposites Attract cartridge.


I've seen a few variations of this on Pinterest. I didn't want to have to cut everything by hand, so I cut the only shapes that I could find on Cricut cartridges. Luckily, my friend Sylvia, had a few cartridges that I could borrow.  I taped all of the black paper to some fishing line and hung them up between the two posts.


 A while ago, I placed another order from Bargain Balloons. I went in on an order with a friend so that we could split the flat shipping rate. I just love the selection of balloons, and you cannot beat their prices. (That is not an affiliate link. Bargain Balloons don't know who I am, I just love their site!)


  My last bit from the party was another printable that I found on Pinterest. (Seriously, where did I come up with ideas before Pinterest?) The tags say "A bit of light for Halloween night." I found this printable here.


Claire was dressed up like a horse. (Lucky find this summer while my sister and I were yardsaling!)

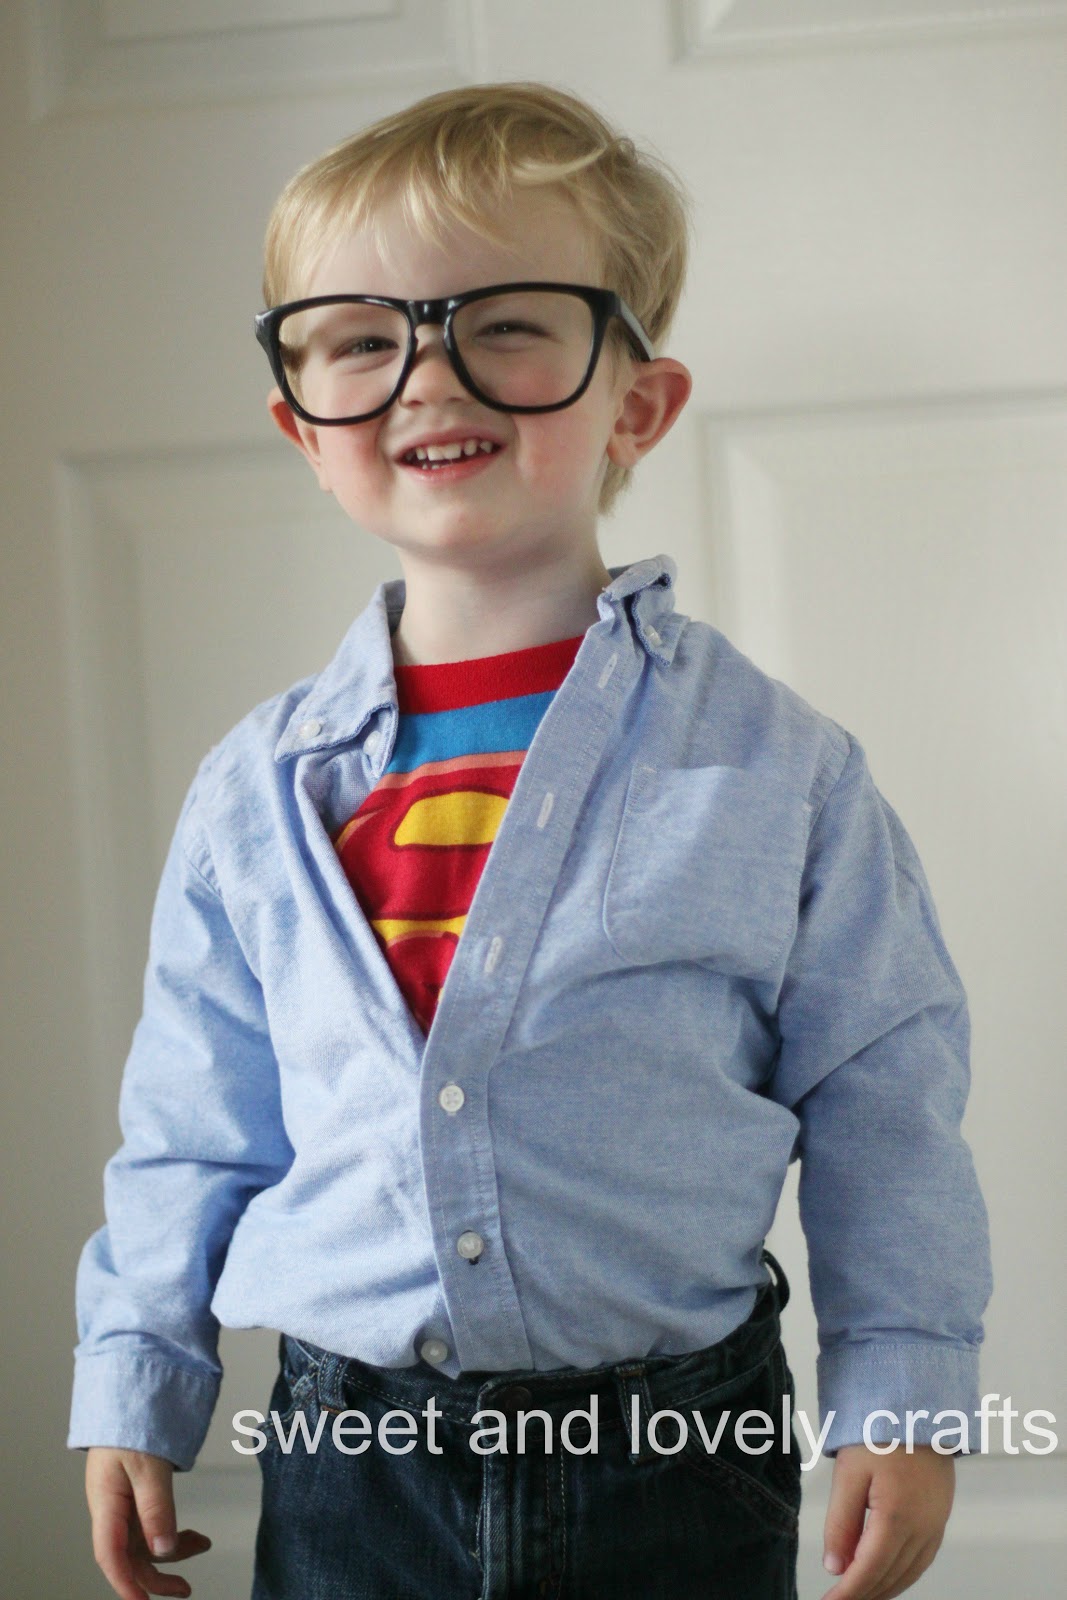
Simon was dressed up as Super Simon, cute kid by day, and superhero by night!

Monday, October 8, 2012

spider thumbprints


We made a lot of Halloween thumbprint crafts last year, but this one is a little different than those ones. Obviously, we started with a piece of cardstock, and Claire stamped her thumb a few times. Once the paint was dry, she drew eight (ish) legs on the spiders and added small googly eyes. Then I cut some of my bakers twine to act as the sipder's webby stuff. I stapled the twine at the top of the page, and secured it at the top of the spider with a small spot of glue. I cut out a purple piece of cardstock, and then a slightly smaller piece of orange paper for the flag. Claire wrote the word 'eek' on the paper, and I used double sided tape to attach it to the finished product. These would make really cute Halloween cards.


Monday, October 1, 2012

toilet paper stamped pumpkins

 This was one of Claire's favorite crafts. Simon enjoyed it too. He loved stamping the pumpkins on the paper, but not as much as he loved painting his little hands and smearing them all over the paper!

Save your next toilet paper roll, because that's what you'll need to stamp the pumpkins! When I first saw Michelle's post about using a toilet roll to stamp hearts, I thought that it was a great idea. The paper rolls are so easy for the kids to hold and use. Simon is 2, and he was able to stamp these with no problem. I gave the kids a couple of sheets of white paper and had them stamp lots of orange circles on the paper. (I just poured some orange paint on a piece of tin foil.) Once all of the stamped circles are dry, have a child draw the stems on the pumpkins. 

Materials needed:
paper (I used cardstock)
orange paint
green & black crayon/marker
googly eyes
orange tissue paper
orange sparkly paint (or glitter if you like cleaning up the glitter mess)

Of course, the best part of my list above is that you can just use what you have on hand. No tissue paper? Don't make those pumpkins.

For the sparkly paint pumpkin, I mixed some white glitter paint with the orange paint. I had planned to use glitter, but then I remembered how much I hate cleaning up glitter messes. This was perfect, Claire loved the glittery paint. 

For the tissue paper pumpkin, I cut out squares of tissue paper for Claire. No need to be exact cutting these, just cut them 1inch-ish by 1 inch-ish. Claire crumpled them into balls, and then glued them on her pumpkins. 

For the last two pumpkins, Claire drew the faces on the pumpkins. On some of the pumpkins she glued on googly eyes, and the others she drew triangle eyes. She had a great time drawing scary, happy and surprised faces. 


How's that for a festive Halloween craft? Break out the toilet paper rolls, and show me what you've made with them!

Monday, September 24, 2012

Hallowen symmetry blob monsters!

Here's a wonderfully simple painting project to kick off the fall season. 
 You make these like you make any other symmetry painting. Fold the paper in half. Claire used a sponge paintbrush to dab the paint on one half of the page. Then she folded the paper in half and rubbed the pages together.
 When the paint was dry, we sat down to decorate our blob monsters. Claire glued on as many googly eyes as she wanted to. Then she used a black marker to draw scary arms, legs and surprised mouths.
And there you have it. A fun, but super simple project to kick off a new season. I used some washi tape to hang them on our laundry room door so that Claire can admire her work all day long!

Monday, September 10, 2012

Fun Fall Crafts

Welcome back, blog friends. I didn't intended to take a month and half long hiatus from my blog, but between returning to work, and a fairly uninspired crafty summer, I didn't have much energy to blog. Not to worry though, fall is one of my favorite times of the year. We've already done three new projects this weekend! While I prepare those projects to post, I thought that I'd round up my favorites from previous years. Enjoy!

1. Handprint turkeys
2. Free printable of fall activities
3. Footprint fire trucks
4. Footprint flying witches
5. Halloween subway art
6. Best ever banana muffins
7. Leaf print hungry caterpillar print
8. Halloween bouquet
9. Halloween thumbprint art (see below)


Related Posts Plugin for WordPress, Blogger...